Key Takeaways
- Start by evaluating comfort problems, insulation, layout, and electrical capacity.
- Ductless heat pumps can be especially useful for additions, older homes, garages, and rooms with uneven temperatures.
- Proper sizing and placement matter more than simply choosing the largest available system.
- Written estimates should clearly cover equipment, labor, electrical work, drainage, permits, and commissioning.
- Rebate requirements, eligible equipment, and application deadlines can vary by utility and location.
A ductless heat pump upgrade can improve year-round comfort without requiring a complete renovation, but the best results begin well before installation day. Homeowners who shop mini splits online should first focus on their home’s needs, including which rooms feel too hot, too cold, drafty, humid, or difficult to use during certain seasons.
The goal is not to buy the most powerful system or the one with the longest feature list. A successful plan matches equipment to the home’s layout, climate, insulation levels, and daily routine. That approach can help avoid uneven temperatures, excess noise, unexpected electrical work, and frustrating operating costs.
1. Why Planning Matters Before Installation
Heat pumps move heat rather than creating it through combustion, which makes design details important. Consider a two-story home where an upstairs bedroom overheats in summer while a finished basement stays chilly in winter. One centrally placed indoor unit may not solve both problems, especially when doors stay closed or airflow paths are limited.
Planning also helps homeowners decide whether they need one zone, several zones, or a mixed approach. A system that fits the way people actually occupy the house will usually provide more dependable comfort than a rushed, one-size-fits-all decision.
2. How To Check The Home First
Before requesting estimates, create a short home-comfort inventory. List troublesome rooms and note when problems occur. Record the age and fuel type of current heating and cooling equipment, then look for conditions that increase heating or cooling demand.
- Check attic, basement, crawl space, and wall insulation where accessible.
- Look for drafts around doors, windows, outlets, plumbing openings, and attic hatches.
- Identify rooms that remain closed, receive strong afternoon sun, or are used only part of the day.
- Inspect existing ductwork for loose connections, visible damage, or rooms with weak airflow.
3. Ducted Or Ductless: Which Fits Better?
Ductless systems use indoor air handlers connected to an outdoor unit, while ducted systems distribute conditioned air through concealed ducts. Neither approach is automatically better. The right choice depends on the home and the comfort goals.
- Ductless may fit well when:there is no existing ductwork, an addition needs conditioning, or occupants want room-by-room control.
- Ducted may fit well whenthe home has usable ducts, and central air distribution is the priority.
- A mixed system may fit well when:a main portion of the home has ducts, but an attic room, garage conversion, or addition needs its own zone.
- Appearance and maintenance differ:ductless units are visible in the room and need accessible filters, while ducted equipment keeps air delivery more hidden but relies on well-designed ducts.
For homes considering ductless equipment, proper sizing and regular maintenance remain essential to comfort and long-term performance.
4. Why Proper Sizing Matters
Square footage is only a starting point. Ceiling height, window area, insulation, air leakage, sun exposure, local weather, and the number of occupants can all affect demand. An oversized system may cycle too often and remove less humidity, while an undersized system may run for long periods without reaching the set temperature.
Ask each installer whether they use a room-by-room load calculation, often called a Manual J calculation, rather than relying on a rule of thumb. Also, compare efficiency ratings carefully. SEER2 describes seasonal cooling efficiency, and HSPF2 describes seasonal heating efficiency. The SEER2 and HSPF2 rating system can help compare models, but high ratings do not replace correct design, installation, and airflow.
5. Choosing Indoor And Outdoor Unit Locations
Indoor Placement
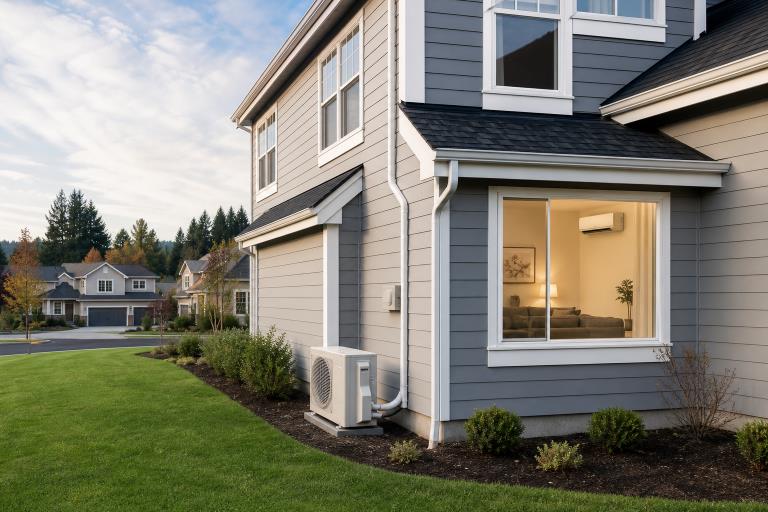
Indoor units should have a clear path for air to move across the room. Avoid locations blocked by curtains, shelves, or tall furniture. In bedrooms, consider both sound levels and whether the airflow will blow directly onto the bed. Placement should also work with lighting, trim, wall art, and future furniture arrangements.
Outdoor Placement
The outdoor unit needs a stable base, sufficient service clearance, and room for drainage. Keep it away from heavy leaf buildup, snow piles, standing water, and stored materials. Consider vibration, nearby windows, patios, bedrooms, and property lines before finalizing the location.
6. Electrical, Drainage, And Permit Checks
Confirm that the electrical panel can support the new equipment and determine whether a dedicated circuit or panel upgrade is needed. Plan where condensate will drain during cooling operation and defrost cycles. Before work starts, ask who handles permits, electrical connections, refrigerant work, inspections, and final testing. Local requirements can differ significantly, so do not assume a permit exemption or rebate eligibility applies to every project.
7. Building A Realistic Project Budget
Instead of comparing one broad price, review the complete scope of work. A detailed estimate should separate equipment and controls, labor, mounting hardware, line-set materials, electrical upgrades, condensate drainage, permits, insulation or air-sealing improvements, and future maintenance. It should also identify capacity, efficiency ratings, warranty terms, exclusions, and who is responsible for commissioning.
8. What To Expect During Installation
A typical project includes confirming measurements, preparing indoor and outdoor mounting points, installing refrigerant lines, wiring and drainage, then testing the system. The final commissioning process should check airflow, temperature response, electrical performance, drainage, controls, and safe operation. Before the crew leaves, homeowners should receive a walkthrough covering remote settings, filter cleaning, and basic troubleshooting.
9. Simple Maintenance For Reliable Operation
Clean indoor filters regularly, keep the outdoor coil clear of leaves and debris, and make sure drain lines remain open. Watch for ice buildup, unusual odors, new noises, weak airflow, or repeated error messages. Homes with pets, construction dust, or frequent operation may need more frequent filter care than a lightly used guest room.
10. Common Planning Mistakes To Avoid
- Choosing capacity based only on square footage.
- Ignoring insulation problems and air leaks.
- Using too few indoor units for a closed-off floor plan.
- Overlooking drainage, electrical upgrades, permits, or service access.
- Comparing estimates without checking what each contractor excludes.
- Assuming a rebate will still be available after installation.
- Skipping final testing and the homeowner walkthrough.
A Practical Way To Move Forward
Before requesting quotes, list the rooms that need better comfort, review insulation and existing equipment, decide whether zoning matters, and gather at least two detailed estimates. Ask direct questions about sizing, placement, electrical capacity, drainage, permits, maintenance, and rebate timing. A well-planned ductless heat pump upgrade should fit the home, local climate, and household routine, not just the available wall space.