Key Takeaways
- Keep freshwater, raw water, wastewater, fuel, and electrical systems clearly separated.
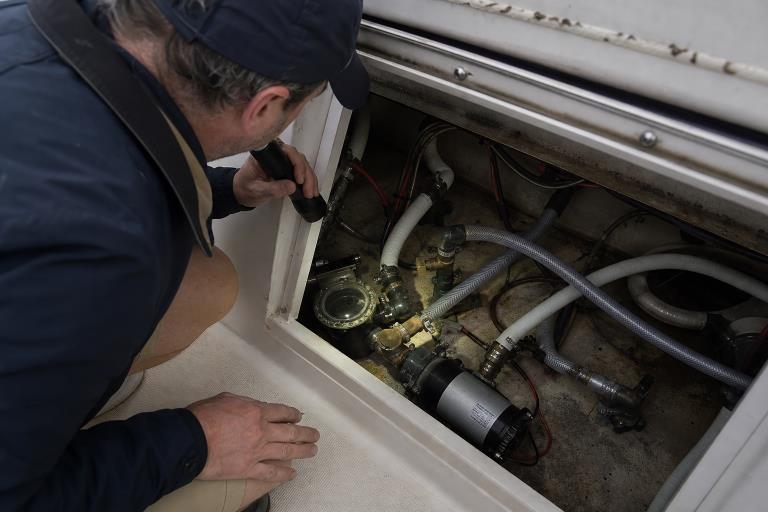
- Place pumps, filters, valves, and hose connections where they can be reached without dismantling the interior.
- Use marine-suitable hoses, fittings, clamps, and supports that can withstand vibration, moisture, and corrosion.
- Inspect the system regularly, especially before trips and before long-term storage.
Boat plumbing is easy to overlook until a loose clamp, a blocked vent, or an inaccessible valve turns into a wet locker, a persistent odor, or an expensive repair. A dependable system starts with a clear plan for freshwater, raw water, drainage, and sanitation lines, along with easy access to critical marine engine room parts that may be located in nearby compartments.
Whether you own a compact cruiser, a fishing boat, or a liveaboard vessel, the goal is the same: move water where it belongs, keep waste contained, and make every component simple to inspect and service. Good routing, labeling, and maintenance prevent small drips from becoming hidden structural, electrical, or engine-space problems.
Why Planning Matters
Boat plumbing works harder than household plumbing. Hull movement, engine vibration, tight access, salt air, changing temperatures, and long idle periods all stress hoses and connections. A small cruiser may have a leak behind a cabinet for weeks simply because the nearby shutoff valve is inaccessible. Planning for access can prevent that kind of damage.
The Main System Zones
Think of onboard plumbing as four separate zones. Freshwater includes deck fills, tanks, pumps, filters, heaters, faucets, and showers. Raw-water systems use seacocks, strainers, intake hoses, and pumps to bring outside water aboard. Wastewater includes sink drains, shower sumps, toilets, holding tanks, vents, and pump-out fittings. Bilge and drainage systems direct unwanted water away from living and machinery spaces. Avoid cross-connections between these zones, particularly between potable water and waste or raw-water lines.
Building a Freshwater Layout
A typical freshwater route runs from the deck fill to a tank, then through a pickup line, a pump, a strainer, a filter, and distribution lines to fixtures. Tank placement affects vessel trim, usable storage, and service access. Select capacity based on crew size, trip duration, and intended use. Two people on a weekend trip may need only drinking, cooking, and basic washing water, while a family living aboard needs a greater capacity for showers and regular cleaning.
Before installation, confirm that the tank can be inspected, the pump strainer can be cleaned, and winterizing connections can be reached. In cold climates, protect exposed lines and water heaters from freezing. Route hoses away from sharp edges, heat sources, and moving machinery.
Managing Wastewater Responsibly
Graywater generally comes from sinks and showers, while blackwater comes from toilets and sanitation equipment. Both require thoughtful routing, reliable venting, and clearly labeled fittings. Holding-tank vents deserve special attention because restricted airflow can cause odors, poor toilet performance, or tank damage.
For U.S. boaters, the EPA’s vessel sewage discharge guidance is a useful starting point for understanding marine sanitation devices, no-discharge zones, and responsible disposal practices. Use approved pump-out facilities where required, secure discharge valves when applicable, and check state, local, marina, and vessel-specific requirements before modifying a sanitation system.
Choosing Pipes, Hoses, Pumps, and Valves
Every component should match its job. Freshwater hoses must be suitable for potable water and the expected pressure. Waste hoses need to be odor-resistant and compatible with sanitation chemicals. Pipes can work well on straight, protected runs when supported properly. Pumps must match the required flow, vertical lift, voltage, and duty cycle.
- Valves:Keep them labeled, accessible, and easy to operate in an emergency.
- Clamps and fittings:Use correctly sized, corrosion-resistant hardware without over-tightening.
- Strainers and filters:Protect pumps from debris and make low-pressure problems easier to diagnose.
- Supports:Prevent chafe, sagging, kinks, and vibration-related cracking.
A Step-by-Step Installation Process
- Draw a diagram showing every tank, hose, pump, valve, fixture, and through-hull connection.
- Measure routes, bends, vertical rises, and the clearance needed for future service.
- Dry-fit components before using sealants or permanent connections.
- Install shutoffs where they can be reached quickly and label both ends of each line.
- Support every run, protect it from chafe, and keep system types physically separated.
- Test one section at a time before closing panels, floors, or cabinetry.
- Photograph the completed layout and save hose sizes, fitting types, and replacement notes.
Common Failures and Warning Signs
Start troubleshooting with simple checks. Confirm tank level, battery power, breaker position, valve alignment, filter condition, and pump operation before replacing parts. Common issues include loose clamps, air leaks on a pump inlet, clogged strainers, cracked fittings, failed check valves, blocked vents, corrosion around metal connections, and damp areas hidden under flooring.
Watch for a pump that cycles when no fixture is open, a sudden drop in water pressure, unusual odors, discolored water, unexplained bilge water, or corrosion around seacocks. These signs often point to an issue before a larger failure occurs.
A Practical Maintenance Checklist
Before Each Trip
- Check freshwater and holding-tank levels.
- Inspect visible hoses, clamps, fittings, and damp areas.
- Test faucets, showers, pumps, toilets, and shutoff valves.
- Confirm seacocks and discharge valves are in their intended positions.
Every Few Months
- Clean strainers and replace filters as needed.
- Inspect supports, chafe guards, vents, deck fills, and hose runs.
- Test emergency shutoffs and update the plumbing diagram after changes.
Before Long-Term Storage
- Drain or winterize systems as conditions require.
- Protect pumps and heaters from freezing.
- Clean the tanks according to the equipment instructions and leave the compartments dry.
Safety and Compliance Checks
Plumbing should always be reviewed alongside electrical, fuel, and engine systems. Shut off power before working around pumps or heaters, close seacocks before removing underwater fittings, ventilate enclosed spaces, and wear gloves and eye protection when servicing wastewater equipment. For underwater penetrations, major sanitation changes, or recurring leaks in difficult areas, a qualified marine technician can provide an important final review.
Final Takeaway
Reliable boat plumbing comes from careful planning, compatible components, accessible shutoffs, protected hose routing, and routine inspection. Keep a simple system diagram aboard, address warning signs early, and treat every small leak as an opportunity to prevent a much larger repair.