Key Takeaways
- Effective lift planning begins before equipment, materials, or crews arrive at the work area.
- Load weight, dimensions, lift radius, placement height, ground conditions, and nearby hazards all influence equipment selection.
- A written, site-specific lift plan gives the crew a shared process for identifying and controlling hazards.
- Clear responsibilities for the operator, rigger, signal person, and supervisor reduce confusion during critical work.
- Weather, overhead power lines, traffic, and public access require active controls, not assumptions.
Safe lifting should begin with careful planning, followed by the selection of equipment. Whether a project involves setting structural steel at height, placing rooftop mechanical units, or moving materials into a confined staging area, the work must be organized to suit the site’s specific conditions. Early coordination also makes it easier to arrange mobile crane rentals that fit the required reach, capacity, access route, and setup footprint.
A lift that appears routine can become complicated when the load is farther from the crane than expected, access is blocked by another trade, or the set-down area is not ready. A practical plan gives the team time to correct those issues before a suspended load is in motion.
Why Lift Planning Deserves Early Attention
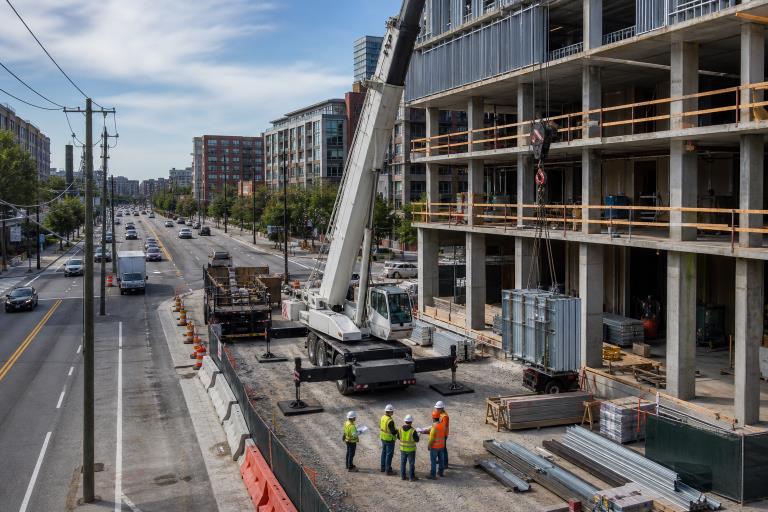
Lifting operations influence more than the crew at the hook. They affect delivery timing, material staging, road access, pedestrian routes, the work sequence of nearby trades, and the space available for emergency access. Planning early allows the site team to reserve a setup area, prepare the landing zone, and avoid placing equipment where it conflicts with excavation, concrete work, or ongoing deliveries.
Consider a mid-rise project beside an active street. A crane may have enough rated capacity for the load, but the lift can still be impractical if outriggers obstruct a lane, the boom path passes near utilities, or the roof crew has not cleared the placement zone. Identifying these constraints during scheduling is far safer and more efficient than improvising on lift day.
What a Lift Plan Should Include
A good lift plan is specific enough for the crew to understand the task and recognize when site conditions no longer match the plan. It should identify the load’s verified weight, dimensions, center of gravity, attachment points, pick-up location, and final placement point. It should also document the planned lift height, working radius, crane configuration, rigging arrangement, setup location, and controlled access area.
The plan should state who is responsible for operating, rigging, signaling, supervising, and controlling traffic or public access. It should also establish communication methods, expected weather limits, and stop-work conditions.
How to Match Equipment With the Job
Equipment should be selected after the lift requirements are known. The relevant capacity is the value shown in the applicable manufacturer load chart for the planned configuration, boom length, radius, and operating conditions, not the machine’s headline maximum capacity. The total lifted load should account for the item being moved as well as rigging and lifting accessories.
Questions to Resolve Before Selection
- Can the equipment handle the complete load at the intended radius and height?
- Is there enough room for setup, boom movement, counterweight clearance, and safe access?
- Can the crane reach the set-down point without an unplanned repositioning?
- Will site gates, turning areas, roads, or overhead obstructions limit delivery or travel?
- Do manufacturer instructions or project engineering requirements impose additional limits?
A compact machine may be appropriate where access is constrained, while a larger unit may be necessary for a longer reach or heavier pick. The correct choice depends on the complete lift plan, not on a preference for a particular equipment size.
Ground Conditions and Crane Stability
Ground conditions deserve the same attention as the load itself. Soil, fresh fill, paving, slopes, trenches, buried utilities, basements, vaults, and recently backfilled excavations can all affect whether a setup area can support concentrated equipment loads. Rain, frost, or site changes can also alter conditions between the original review and the scheduled lift.
Before setup, verify the outrigger locations, support materials, level requirements, and separation from excavations or edges. A surface that looks firm may conceal a void, utility corridor, or poorly compacted fill. When the bearing capacity is unclear, the lift should be reviewed with the appropriate qualified personnel and project engineering resources before proceeding.
Rigging, Load Control, and Communication
Rigging connects planning to execution. Inspect slings, hooks, shackles, spreader bars, lifting lugs, and other hardware before use, and confirm that each component is suitable for the load and rigging arrangement. The crew should account for sling angles, potential load shift, sharp edges, and the need to keep hands clear of pinch points while attaching or guiding the load.
One designated signal person should direct the operator whenever the operator cannot clearly see the load path or placement area. Radios should be checked before the lift, and the team should agree on hand signals and the stop signal. If a signal is unclear, lost, or contradicted, the operation should stop until communication is restored. NIOSH lift-zone safety guidance emphasizes keeping nonessential workers out of the lift zone and preventing workers from being under a suspended load.
Power Lines, Weather, and Site Traffic
Walk the proposed load path and identify overhead lines, nearby buildings, scaffolding, roadways, pedestrian routes, and active equipment areas. Power-line hazards require special planning because the crane, boom, load line, rigging, and load may all create clearance concerns. Establish the needed controls before the crane enters the work area.
Weather planning should address wind, lightning, poor visibility, ice, and heavy rain. Wind can affect the suspended load, making precise placement difficult, particularly for broad panels, duct sections, and other loads with large surface areas. Barricades, signs, spotters, and traffic controls should be ready before work begins, not added after people or vehicles enter the lift zone.
Pre-Lift Checks and Crew Briefings
- Review the lift plan and each person’s responsibilities.
- Confirm the load weight, attachment points, and final landing area.
- Inspect equipment, rigging, and required safety devices.
- Verify ground support, crane position, and outrigger setup.
- Walk the load path and secure the exclusion zone.
- Test radios or confirm the hand-signal method.
- Use a slow trial lift when it is appropriate to verify balance and control.
- Stop and reassess whenever conditions differ from the plan.
Common Planning Mistakes to Avoid
- Using an estimated weight instead of verifying the load and rigging weight.
- Focusing on the pick-up point while neglecting the set-down location and access path.
- Ignoring how a greater working radius reduces available lifting capacity.
- Setting up near unstable ground, excavation edges, or hidden underground structures.
- Allowing several people to issue directions to the operator.
- Continuing after weather, visibility, traffic, or site access conditions change.
Final Thoughts
Safe lift planning depends on preparation, disciplined communication, and the willingness to pause when conditions change. A strong plan supports compliance, but its practical value extends beyond that. It helps crews protect workers, reduce avoidable disruption, and complete lifting work with greater control from the first setup decision through final placement.