When plastic residue builds up inside an injection molding machine, production quality suffers and equipment wear accelerates. A proper purge cycle removes old material, prevents color contamination, and prepares the machine for new production runs. Understanding the purging process is essential for manufacturers who want to maintain equipment longevity and achieve consistent output quality.
1. Understanding Why Purging Matters
Injection molding machines accumulate degraded plastic, colorants, and foreign material over time. Without regular purging, this contamination transfers to new products, resulting in visible defects, weak structural integrity, and customer complaints. Thermal breakdown of polymer chains creates carbonized particles that clog nozzles and restrict material flow. Equipment operators who skip purging procedures often discover their mistake only after scrap rates climb or machines require expensive repairs.
The cost of poor purging extends beyond defective parts. When residual material remains in the barrel and nozzle, it can alter the temperature profile of incoming material, making it difficult to maintain consistent mold conditions. This inconsistency forces technicians to constantly adjust process parameters, wasting time and reducing productivity. Regular, effective purging prevents these cascading problems and keeps the operation running efficiently.
2. Selecting the Right Purging Material
Standard purging compounds fall into two main categories: mechanical purging compounds and chemical purging compounds. Mechanical purges use abrasive particles suspended in a carrier resin to physically scrub the barrel and screw, removing stubborn residue. Chemical purges rely on solvents and special resins to dissolve and suspend contaminants, making them gentler on equipment during removal.
Choosing between mechanical and chemical purges depends on the specific situation. Severe carbon buildup or switching between drastically different plastic types calls for a mechanical purge, which delivers faster results. For routine maintenance between color changes or minor contamination, chemical purges often suffice and minimize thermal stress on the equipment. Professionals managing frequent material transitions consult resources covering injection molding purging methods to determine the most effective sequence for their production environment, ensuring thorough cleaning while protecting equipment integrity. Some manufacturers use both approaches in sequence, starting with mechanical purging followed by a chemical purge for final conditioning.
3. Preparing Your Machine for Purging
Before introducing purging material, reduce the barrel temperature to a level appropriate for the purging compound being used. Most purging materials have recommended temperature ranges printed on their packaging. Running purge compound at excessive temperatures can cause it to degrade too quickly, reducing its cleaning effectiveness and potentially damaging sensitive machine components.
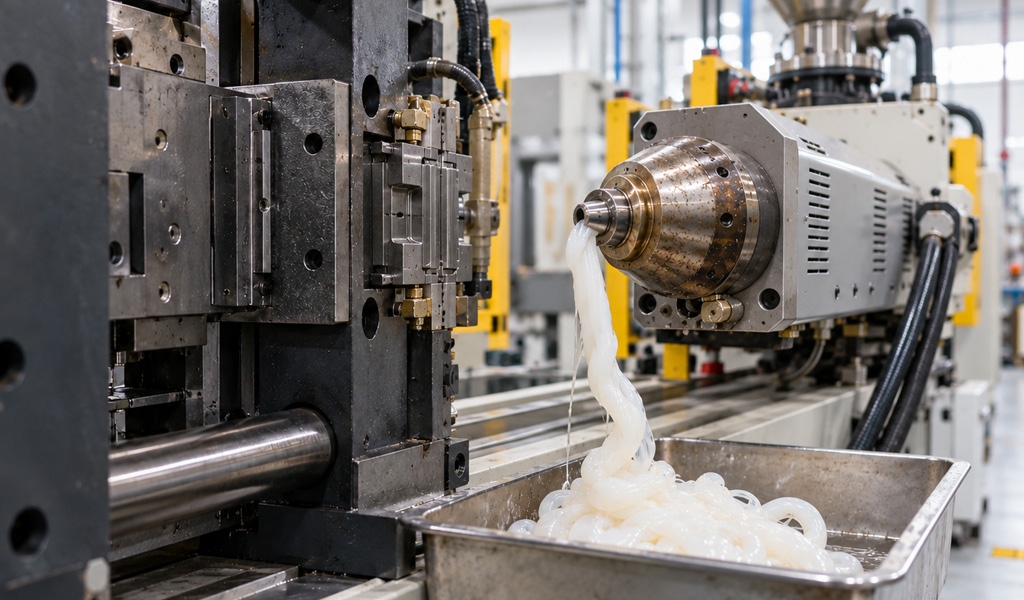
Clear the hopper of all production material and check for any foreign objects that might interfere with the purging process. Set the screw speed to a moderate level, typically 50 to 60 percent of normal operating speed. This slower speed allows the purging compound more time to make contact with barrel walls and dislodge contaminants. Ensure that the mold is clamped and ready to collect purge discharge, or position a collection bin beneath the nozzle to catch the material safely.
4. Executing the Purge Cycle
Load the purging compound into the hopper and allow it to reach thermal equilibrium inside the barrel. Start the injection press and run material through in steady increments, monitoring the nozzle discharge for signs of residual contamination. The first material coming out will typically appear dark or discolored, containing loosened debris from previous production runs. Continue injecting until the discharge material appears clean and uniform in color.
Document the volume of purge material used to establish a baseline for future purging cycles. Most purge procedures require between 50 and 150 grams of compound, depending on machine size and contamination severity. After purging is complete, allow the barrel to cool slightly before reintroducing production material. This cooling period helps the machine stabilize thermally and prevents thermal shock when new polymer is loaded.
5. Monitoring Results and Troubleshooting
A successful purge produces clean, consistent material at the nozzle with no visible discoloration or texture changes. If discharge material remains dark or grainy even after extended purging, the initial purge temperature may have been too low or the barrel may have extreme buildup. Increasing the temperature by five to ten degrees and running additional purge cycles typically improves results. Persistent discoloration after several cycles warrants a closer inspection of the screw and barrel for mechanical wear or deep carbon deposits.
Some operators experience nozzle blockages or unusually high back pressure during purging, which signals that purge material is meeting significant resistance inside the machine. This often indicates carbon deposits are tightly adhered to internal surfaces. Allowing the purge compound additional dwell time at elevated temperature before injection can improve results in these cases. If back pressure remains dangerously high, reducing injection speed and running shorter cycles helps avoid hydraulic strain.
Conclusion
Effective purging requires understanding the equipment’s specific needs and selecting the appropriate purging method for each situation. By following a consistent purging procedure, monitoring results carefully, and adjusting the approach based on observed outcomes, manufacturers can minimize equipment downtime and maintain product quality across all production runs. Regular purging is preventive maintenance that pays dividends through reduced scrap rates, fewer equipment repairs, and more reliable molding operations overall.